In the world of Linux, adoption of systemd has been a subject of heated controversy, and the debate between its proponents and critics is still going on. As of today, most major Linux distributions have adopted systemd as a default init system.
Billed as a “never finished, never complete, but tracking progress of technology” by its author, systemd is not just the init daemon, but is designed as a broader system and service management platform which encompasses the growing ecosystem of core system daemons, libraries and utilities.
One of many additions to systemd is systemd–networkd, which is responsible for network configuration within the systemd ecosystem. Using systemd–networkd, you can configure basic DHCP/static IP networking for network devices. It can also configure virtual networking features such as bridges, tunnels or VLANs. Wireless networking is not directly handled by systemd–networkd, but you can use wpa_supplicant service to configure wireless adapters, and then hook it up with systemd–networkd.
On many Linux distributions, NetworkManager has been and is still used as a default network configuration manager. Compared to NetworkManager, systemd–networkd is still under active development, and missing features. For example, it does not have NetworkManager’s intelligence to keep your computer connected across various interfaces at all times. It does not provide ifup/ifdown hooks for advanced scripting. Yet, systemd–networkd is integrated well with the rest of systemd components (e.g., resolved for DNS, timesyncd for NTP, udevd for naming), and the role of systemd–networkd may only grow over time in the systemd environment.
If you are happy with the way systemd is evolving, one thing you can consider is to switch from NetworkManager to systemd–networkd. If you are feverishly against systemd, and perfectly happy with NetworkManager or basic network service, that is totally cool.
But for those of you who want to try out systemd–networkd, you can read on, and find out in this tutorial how to switch from NetworkManager to systemd–networkd on Linux.
Requirement
systemd–networkd is available in systemd version 210 and higher. Thus distributions like Debian 8 “Jessie” (systemd 215), Fedora 21 (systemd 217), Ubuntu 15.04 (systemd 219) or later are compatible with systemd–networkd.
For other distributions, check the version of your systemd before proceeding.
Switch from Network Manager to Systemd-Networkd
It is relatively straightforward to switch from Network Manager to systemd–networkd (and vice versa).
First, disable Network Manager service, and enable systemd–networkd as follows.
$ sudo systemctl enable systemd-networkd
You also need to enable systemd–resolved service, which is used by systemd–networkd for network name resolution. This service implements a caching DNS server.
$ sudo systemctl start systemd-resolved
Once started, systemd–resolved will create its own resolv.conf somewhere under /run/systemd directory. However, it is a common practise to store DNS resolver information in /etc/resolv.conf, and many applications still rely on /etc/resolv.conf. Thus for compatibility reason, create a symlink to /etc/resolv.conf as follows.
$ sudo ln -s /run/systemd/resolve/resolv.conf /etc/resolv.conf
Configure Network Connections with Systemd-networkd
To configure network devices with systemd–networkd, you must specify configuration information in text files with .network extension. These network configuration files are then stored and loaded from /etc/systemd/network. When there are multiple files, systemd–networkd loads and processes them one by one in lexical order.
Let’s start by creating a folder /etc/systemd/network.
DHCP Networking
Let’s configure DHCP networking first. For this, create the following configuration file. The name of a file can be arbitrary, but remember that files are processed in lexical order.
[Match]
Name=enp3*

[Network]
DHCP=yes
As you can see above, each network configuration file contains one or more “sections” with each section preceded by [XXX] heading. Each section contains one or more key/value pairs. The [Match] section determine which network device(s) are configured by this configuration file. For example, this file matches any network interface whose name starts with ens3 (e.g., enp3s0, enp3s1, enp3s2, etc). For matched interface(s), it then applies DHCP network configuration specified under [Network] section.
Static IP Networking
If you want to assign a static IP address to a network interface, create the following configuration file.
[Match]
Name=enp3s0

[Network]
Address=192.168.10.50/24
Gateway=192.168.10.1
DNS=8.8.8.8
As you can guess, the interface enp3s0 will be assigned an address 192.168.10.50/24, a default gateway 192.168.10.1, and a DNS server 8.8.8.8. One subtlety here is that the name of an interface enp3s0, in facts, matches the pattern rule defined in the earlier DHCP configuration as well. However, since the file “10-static-enp3s0.network” is processed before “20-dhcp.network” according to lexical order, the static configuration takes priority over DHCP configuration in case of enp3s0 interface.
Once you are done with creating configuration files, restart systemd–networkd service or reboot.
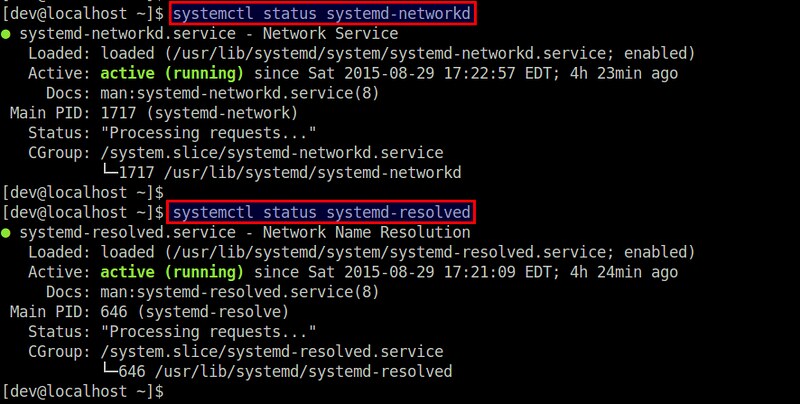
Check the status of the service by running:
$ systemctl status systemd-resolved
Configure Virtual Network Devices with Systemd-networkd
systemd–networkd also allows you to configure virtual network devices such as bridges, VLANs, tunnel, VXLAN, bonding, etc. You must configure these virtual devices in files with .netdev extension.
Here I’ll show how to configure a bridge interface.
Linux Bridge
If you want to create a Linux bridge (br0) and add a physical interface (eth1) to the bridge, create the following configuration.
[NetDev]
Name=br0
Kind=bridge
Then configure the bridge interface br0 and the slave interface eth1 using .network files as follows.
[Match]
Name=eth1

[Network]
Bridge=br0
[Match]
Name=br0

[Network]
Address=192.168.10.100/24
Gateway=192.168.10.1
DNS=8.8.8.8
Finally, restart systemd–networkd:
You can use brctl tool to verify that a bridge br0 has been created.
Summary
When systemd promises to be a system manager for Linux, it is no wonder something like systemd–networkd came into being to manage network configurations. At this stage, however, systemd–networkd seems more suitable for a server environment where network configurations are relatively stable. For desktop/laptop environments which involve various transient wired/wireless interfaces, NetworkManager may still be a preferred choice.
For those who want to check out more on systemd–networkd, refer to the official man page for a complete list of supported sections and keys.